
Simple ways to build a Rockman helmet.
Rockman is the character and protagonist by Capcom that created by Akira Kitamura for the first Rockman game released in 1987. It was become one of Capcom’s mascots and one of primary original character.
In this blog, we will try to use various SOLIDWOKRS function and technique to create a simple Rockman Helmet for retrospect the Capcom classic role.

(Pic.1)
For the beginning, sketch the half-circle through the origin on the top plane. Select the revolve feature to create a sphere. So, why the sphere needs to use half-circle in revolve feature (see Pic.1) for creating a sphere? As revolve feature need to Create a sketch that contains one or more profiles and a centreline, line, or edge to use as the axis around which the feature revolves. Using that cross section to revolve 360 degrees for the designed shape, it will be failed if using the non-cross section sketch for revolve feature.
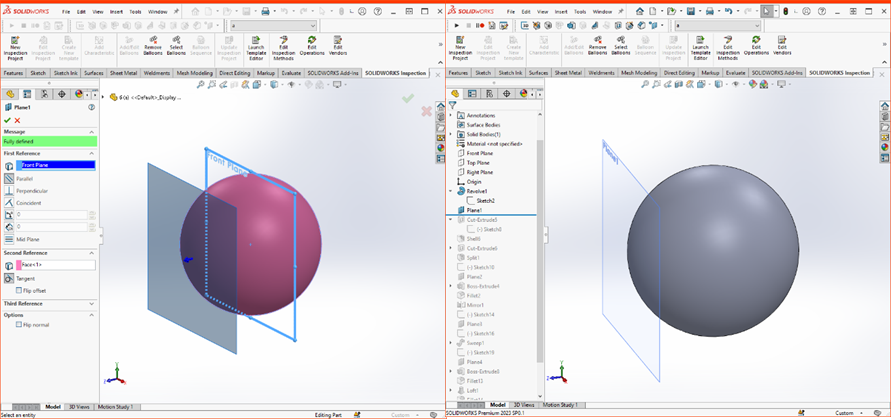
Click reference geometry to build a reference plane on the solid circle with a curve line as a second reference.
(Pic.2)
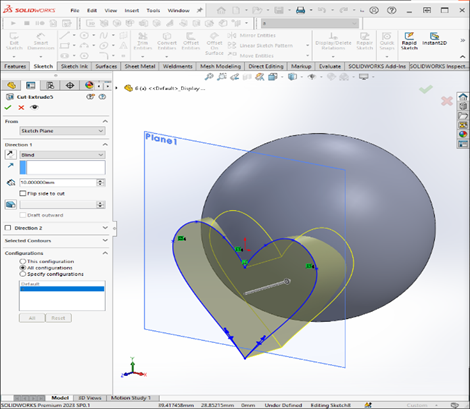
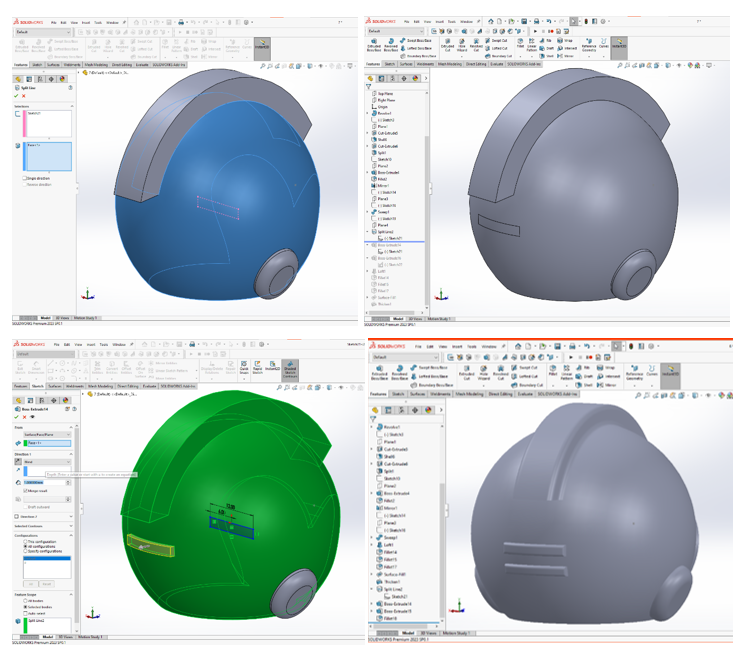
Sketching a heart shape (see Pic.2) at the new reference plane using lines with a vertical relation to the origin for positioning in the centre of solid circle. Apply a cut-extrude feature to the circle with 10 mm in depth
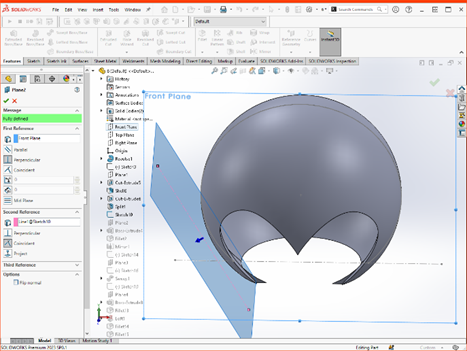
Click a shell tool to the model and select three faces with a 1 mm value.

(Pic.3)
Add a new sketch on the reference plan and create a rectangle shape (see Pic.3). Select cut-extrude to the model by using through all setting.
Open a new sketch on the front plane, draw two construction line with 60 degree and set a point at the circumference with 7.38 mm height from the bottom construction line. Thus, set a 2 mm value between the diagonal line and the point.
Next, create another reference plane by selecting front plane and the diagonal line for the further action.

(Pic.4)
Sketch an Ellipse (see Pic.4)with the value of 11mm and 9.6mm on the reference plane and click boss-extruded with the direction of up to surface.
Also, click fillet with the value in 2mm and select Mirror feature with Right Plane reference to copy the feature to the other side for building the earlap.
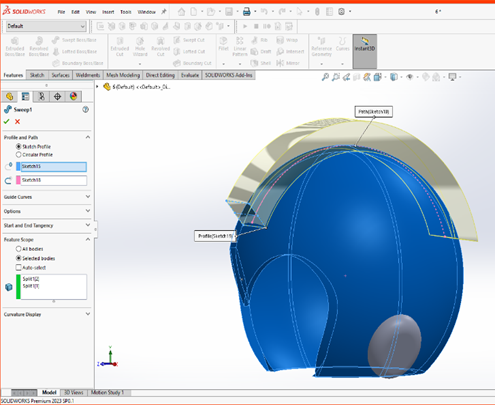
(Pic.5)
Add a new reference geometry plane set by right plane and line for stand-by. After Sketch a rectangle shape (Pic.5) on the reference plane and sketch a curve line at right plane, click Sweep boss/base with the sketch profile and path for creating the arched shape over the hamlet.
(Pic.6)
Next, sketch a rectangle shape (see Pic.6) at the front plane and use split line feature for projecting the sketch at the surface of sphere. In term of the split line feature, if we are going to draw a sketch at a curve surface, spit line feature will help us to project the sketch from the reference plane to the designated curve face with an exactly dimension and position and repeat the step.
Then, selecting from surface/face/plane for extruded the rectangle shape to the value of 1 mm
Also, click fillet with the value of 1mm for rounding the edges.
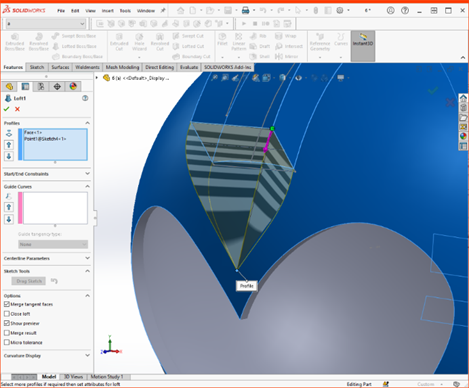
(Pic.7)
Next, sketch a point (see Pic.7) on the surface of the head. Click loft feature with two profile to create a quadrangular pyramid at the forehead area. Then, select direct editing for combining two separated body into one solid body for our use. With designing complex parts, combine feature is especially useful for user to create a seamless model in the design process.
After that, select fillet with proper value for rounding off the sharp corner over the arched shape and pyramid.

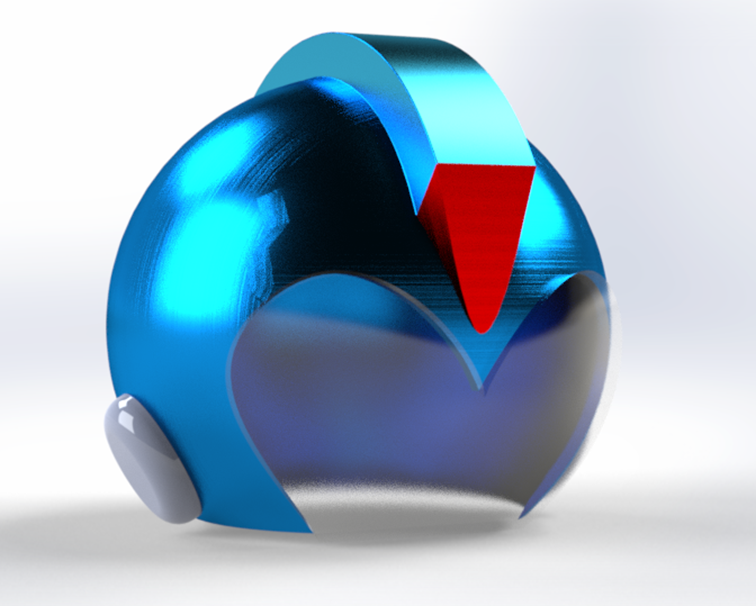
Lastly, select surface-fill feature with 3 edges to create a cover for the hamlet. Thus, use thicker to enhance the width of the surface. Also, you can use edit appearance to customise the colour or pattern according to your design. Then, we have finished to create a Rockman Helmet.
In conclusion, SOLIDWORKS contain multiple tools and feature for us to create numerous models and bring our design ideas to reality. Using simple design process and skill to build a 3D CAD product in rapid time, together we can design whatever we need.
Written by Alan Wong, Intelligent CAD/CAM Technology Ltd.